Professional Garage Door Opener Repair Chattanooga TN

Diagnosing Remote Failures, Motor Malfunctions & Sensor Faults With Precision

When a garage door opener stops responding, the root cause isn't always obvious. You might press the remote and hear the motor hum without the door moving โ€” that typically points to a stripped drive gear, a failed capacitor starving the motor of starting torque, or a detached trolley carriage. If the opener runs for a second then reverses, the problem often lives in the travel limit settings, the RPM sensor on the motor shaft, or a safety sensor circuit that's sending intermittent fault signals. We start every diagnostic by checking the simplest possibilities first: battery contacts inside the remote, power to the outlet, and whether the manual release cord was accidentally pulled. From there, we methodically work through the logic board, wall console wiring, capacitor health, gear assembly wear patterns, and photo-eye alignment until we isolate the exact failure. You get a straightforward explanation of what failed, why it failed, and what it takes to restore dependable operation โ€” whether that means a targeted component repair or a full opener replacement when the cost of parts and labor no longer makes sense against the unit's remaining service life.

Opener issues sometimes reveal problems elsewhere in the garage door system. A door that's heavy because of a broken torsion spring will overload even a brand-new opener, burning out the motor or stripping gears within weeks. Track misalignment creates drag that the opener has to fight against on every cycle, accelerating wear on the drive mechanism. If your door needs sectional panel work or full replacement, the opener's travel limits and force sensitivity must be recalibrated afterward to match the new door weight and balance point. We handle the complete picture โ€” Garage Door Repair for track and hardware issues, Garage Door Installation with opener integration, Garage Door Replacement when panel damage or insulation failure makes replacement the smarter long-term choice, and Garage Door Spring Repair to restore proper counterbalance before it damages your opener.

  • Same-Day Opener Repairs
  • Remote Programming Experts
  • Motor Diagnostics
  • Safety Sensor Repairs
  • Residential Garage Doors
  • Free Estimates
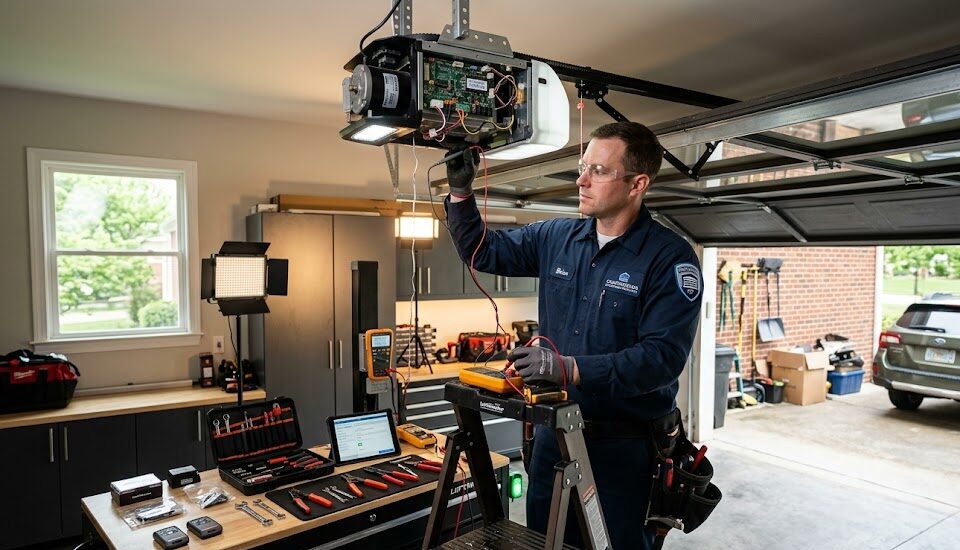
Professional garage door opener repair technician diagnosing motor and remote issues in Chattanooga TN

Common Garage Door Opener Issues We Repair

A garage door opener is more than a motorโ€”it's a system of circuit boards, travel limits, force adjustments, safety beams, and drivetrain components that all need to work together. When one part degrades, the whole system can behave unpredictably. Our diagnosis doesn't stop at symptoms; we trace every problem back to its root cause so the repair lasts.

Many opener failures share early warning signs most homeowners miss: a slight delay before movement, a change in motor pitch, or the door reversing for no clear reason. Catching these early often prevents a complete breakdown. If you're unsure what you're seeing, our Garage Door Repair Services include a full system evaluation. Opener trouble can also originate from worn springsโ€”see our Garage Door Spring Repair Services to learn how balance affects opener lifespan. For immediate questions, Contact Us and we'll help you identify what's happening.

  • Remote Control Failure

    Fresh batteries but no response often means the remote's rolling code has lost sync, the receiver logic board isn't reading the signal, or the antenna wire is damaged. We first verify frequency output, then reprogram or replace the receiver module as neededโ€”rarely just the remote itself.

  • Wall Switch Problems

    An unresponsive wall console can point to a break in the low-voltage wiring, a corroded connection at the opener terminal, or a failed control board that no longer registers the command. We test continuity through the entire circuit before condemning the switchโ€”sometimes the lock button is simply engaged.

  • Motor Failure

    When the motor hums but the door stays put, the drive gearโ€”a sacrificial plastic part inside most AC-motor openersโ€”has likely stripped. We also evaluate capacitor health, chain/belt tension, and travel module settings. A truly burned-out motor is rare; more often the problem is mechanical overload from an unbalanced door.

  • Sensor Misalignment

    Safety sensors must form an unbroken infrared beam. Even slight vibration can knock them out of alignment, causing the door to reverse immediately after touching the floor. We realign both eyes using laser verification, clean lenses, and confirm they stop and reverse the door within the required 2-second safety window.

  • Opener Not Responding

    Zero response from all inputs usually indicates a power supply failure, a tripped GFCI outlet the opener is plugged into, or a dead logic board. We check input voltage at the opener's transformer first, then test the board's diagnostic LED patternsโ€”modern units blink specific fault codes that tell us exactly where to look.

  • Intermittent Operation

    Intermittent issues are often temperature-related: a capacitor that only fails when cold, a solder joint expanding with heat, or a travel limit contact that's marginally making connection. We use freeze spray and heat cycles during diagnosis to recreate the exact conditions that trigger the fault, saving you from guessing.

Garage Door Remote Control Repair

Most garage door remotes manufactured after 1993 use rolling code technologyโ€”every time you press the button, the remote transmits a new, encrypted code from a sequence of billions of possibilities. This prevents thieves from capturing and replaying your signal. But rolling code systems depend on synchronized counters inside both the remote and the opener's receiver. When a power surge, a dead opener backup battery, or an accidental button press while out of range knocks that counter out of sync, the remote becomes useless even though nothing is technically broken. We restore that synchronization and verify the transmitter's actual radio outputโ€”not just assume the remote is dead.

Remote problems can also originate in the opener's logic board, not the handheld transmitter. If the receiver module has a cracked solder joint or the antenna wire has been damaged, no remote will work reliably. For deeper opener-level issues, see our Garage Door Opener Repair diagnostics. If your opener is over 15 years old and replacement parts are becoming scarce, our Garage Door Installation team can discuss modern alternatives. Every repair we perform is covered by our Service Guaranteeโ€”if the programming doesn't hold, we return at no charge.

  • Remote Programming

    Every opener brand handles programming differently. LiftMaster and Chamberlain units use a color-coded learn buttonโ€”yellow, purple, red/orange, or greenโ€”where the color tells us which frequency and security protocol the opener expects. Genie systems often require holding the button until a blue LED blinks, then pressing the remote three times. Universal remotes add another layer: they must first clone the opener's frequency, then capture a valid rolling code. We also check whether your opener's memory is fullโ€”most residential units cap at 8โ€“12 remotes, and older entries may need clearing before a new one will take.

  • Keypad Setup

    Wireless keypads share the same receiver inside your opener as handheld remotes, but they introduce a PIN-based authentication layer that must be programmed separately. Most keypads allow you to set a temporary PIN for a service provider or houseguest, then delete it without affecting your permanent code. Common failure points include corroded battery contacts from moisture intrusion, worn membrane switches that require progressively harder presses, and lost programming after a prolonged power outage drains the opener's capacitor-backed memory. For hardwired keypads, we trace the low-voltage wiring back to the opener terminals and verify continuity before assuming the keypad itself is the problem.

  • Receiver Diagnostics

    The receiver is only as good as its antenna. That short purple or gray wire dangling from your opener motor housing is the antennaโ€”if it's been pinched, chewed by rodents, or tucked inside the metal chassis, range drops dramatically. We also investigate a surprisingly common culprit: LED light bulbs installed in or near the opener. Certain LEDs emit radio-frequency interference in the same 315MHz or 390MHz band your remotes use, effectively jamming the signal whenever the light is on. Our diagnostic sequence includes antenna inspection, RF noise scanning, and receiver sensitivity testing with a known-good transmitter so we isolate the problem to the remote, the receiver, or the environment.

  • Multi-Remote Configuration

    Programming a vehicle's built-in Homelink system often requires two peopleโ€”one inside the car following the manufacturer's sequence, and one at the opener to press the learn button within the 30-second window. Some European vehicles use a different Homelink version that requires an additional compatibility bridge for older North American openers. When you purchase a home with existing remotes you didn't program, we recommend clearing the opener's entire memory and reprogramming only your own devicesโ€”this eliminates any former owner's remotes that could still operate your door. We can also mix remotes from different opener generations on the same system, though pre-1993 DIP-switch remotes require a receiver upgrade for rolling code compatibility.

Garage Door Motor Repair & Replacement

When a homeowner hears the opener humming but the door refuses to move, the natural conclusion is a burnedโ€‘out motor. In reality, most ACโ€‘motor openers rely on a sacrificial plastic drive gear engineered to strip when the door is too heavy or the springs are weakโ€”protecting the motor windings from burnout. A motor that runs without moving the door is rarely dead; the culprit is almost always a stripped gear, a broken sprocket, or a capacitor that can no longer deliver the starting torque needed to overcome inertia. We measure actual motor current draw and test capacitor microfarad ratings under load before recommending any replacement, so you never pay for a motor you don't need.

For openers over 15 years old, replacing the entire unit often makes better longโ€‘term sense than chasing individual component failures that cascade over time. Our Garage Door Replacement Services can upgrade you to a DCโ€‘motor opener with softโ€‘start and battery backupโ€”quieter and far more energyโ€‘efficient. If the door itself feels heavy when operated manually, the motor may be working against worn springs; our Garage Door Repair Services include a full balance assessment because spring health directly dictates motor lifespan. About Us โ€” we're the team that explains the root cause, not just the symptom.

  • Chain Drive Motors

    The classic chain drive uses a metal chain and sprocket to move the trolley. Over time, the white nylon drive gear inside the motor housing is the first thing to failโ€”it's intentionally designed as a mechanical fuse. We replace the gear and sprocket assembly, check chain tension (you should see about ยผโ€ณ to ยฝโ€ณ of deflection at the midpoint), and inspect the sprocket bushing for wear that causes a rattling noise. A dry chain can also create excessive motor strain; we lubricate with white lithium grease on the chain pins onlyโ€”never the rail itselfโ€”to reduce friction without attracting dirt. If the motor still hums after gear replacement, the capacitor is the next suspect and we test it with a multimeter on the capacitance setting.

  • Belt Drive Motors

    Belt drive openers use a reinforced rubber belt instead of a chain, which eliminates metalโ€‘onโ€‘metal noise. The tradeโ€‘off is that belt tension must be exactly right: too tight and the motor bearings take a beating, too loose and the belt jumps teeth or slips, causing the door to stop midway. We adjust tension using the threaded carriage mechanism until the belt deflects about ยผโ€ณ with firm thumb pressure. When a beltโ€‘drive motor hums but won't move, the belt clip connecting the trolley to the carriage has often snappedโ€”a fiveโ€‘minute fix. Because these are DC motors in most modern units, they have optical RPM encoders; a misaligned encoder disc can send the wrong speed signal and shut the motor down. We realign or replace the encoder as needed rather than condemning the motor.

  • Screw Drive Openers

    Screw drive openers have the fewest moving partsโ€”a threaded steel rod rotates inside a carriage with a plastic driven nut. The nut wears out over time, causing the door to jerk or reverse because the force sensor interprets the binding as an obstruction. We replace the driven nut and thoroughly clean the screw rail with a degreaser before applying a specific lowโ€‘temperature lithium grease. Using the wrong lubricantโ€”especially spray white lithium that hardensโ€”is the number one reason these systems fail prematurely; the grease must stay slick in cold weather and not attract debris. The motor itself is a highโ€‘RPM unit with a gear reduction; if it runs but the screw doesn't spin, the coupling between motor and screw shaft may have sheared. We keep several coupling styles on the truck so the fix is immediate.

  • Smart Garage Openers

    Today's smart openers use brushless DC motors controlled by a main logic board that monitors RPM, current, and position via an integrated encoder. When the motor won't run, the opener's app often stores an error codeโ€”something like โ€œmotor overcurrentโ€ or โ€œRPM sensor faultโ€โ€”that tells us whether the issue is mechanical binding, a failed hallโ€‘effect sensor, or a dead battery in the backup unit preventing the board from powering up. We connect to the opener's diagnostic port with a service tool, pull the fault log, and clear stored codes after the repair. Smart openers also have force profiles that can become corrupted after a power surge; we reโ€‘run the autoโ€‘force calibration routine so the motor learns the correct open and close force thresholds again, eliminating unnecessary reversals.

Garage Door Sensor Repair

Photo-eye sensors are the primary safety mechanism preventing your garage door from closing on a person, pet, or object. These two small unitsโ€”one emitting an invisible infrared beam, the other receiving itโ€”must stay perfectly aligned and free of dirt, condensation, or wiring faults. When the beam breaks, the opener either refuses to close or reverses immediately. But a blinking amber LED on the sending sensor, or a solid green light on the receiving one that goes out when you wave your hand through the beam, tells us exactly where the problem lives. We bring laser alignment tools, circuit testers, and manufacturerโ€‘specific diagnostic knowledge to every call, so we fix the root causeโ€”not just wipe a lens and hope it holds.

  • Sensor Alignment

    A garage door that starts closing, then immediately reverses, usually has vertically misaligned sensorsโ€”the invisible beam hits the edge of the receiving lens rather than dead center. Even a stray basketball or vacuum cleaner bump can shift the bracket. We use a laser line projected across the opening to level both sensors to within โ…› inch, then verify the indicator LEDs: a steady amber sender and a solid green receiver (no flickering when the door moves) confirm perfect lock. Sunlight hitting the receiving lens directly can wash out the beam; we often install a small shield or reposition the sensor into the shade if afternoon sun is the hidden culprit.

  • Sensor Replacement

    Not all sensors are interchangeable. A yellowโ€‘learnโ€‘button Chamberlain opener uses a different communication protocol than a redโ€‘button LiftMaster, even though the plastic housings look identical. We match the exact OEM part number or install a compatible aftermarket sensor with the correct pinout and frequency. Before condemning the sensor itself, we check for 5โ€‘6 volts DC at the opener's sensor terminalsโ€”missing voltage points to a blown logic board fuse, not a bad sensor. Many homeowners replace both eyes when only one has failed; we test each separately and replace only what's needed, reprogramming the opener's travel limits afterward if the unit is older and requires a full relearn cycle.

  • Wiring Repair

    Sensor wiring runs along the garage wall, often stapled at the base. Over time, a staple can cut through the insulation and cause an intermittent shortโ€”the door works fine for months, then suddenly refuses to close on a humid morning. We use a wire toner to trace the exact break location behind walls or under baseboards without cutting open drywall unnecessarily. Polarity matters on many openers: reversing the white and striped wires can confuse the logic board into thinking the beam is always broken. For exposed garage interiors, we upgrade to 22โ€‘gauge shielded twistedโ€‘pair cable that resists interference from nearby LED lighting or motors, giving you a rockโ€‘solid signal for years.

  • Safety Testing

    Federal law (UL 325) requires that a closing garage door reverses within two seconds of breaking the photo-eye beam, and the contact autoโ€‘reverse mechanism must reverse upon touching a 2ร—4 laid flat on the ground. After any sensor repair, we run both tests and document the door's reversal force with a force gaugeโ€”if the door exerts more than 15 pounds of downforce before reversing, the springs are likely unbalanced and overloading the opener's safety threshold. We'll show you the results and explain what they mean. This isn't just a functional test; it's a liabilityโ€‘reducing step that confirms your door would protect a child or pet. If any test fails, we adjust the force limits, travel, or door balance until it passesโ€”no shortcuts.

Our Garage Door Opener Repair Process

A reliable repair starts with a methodical diagnosis โ€” skipping steps leads to misdiagnosis and repeat failures. We follow the same sequence every time, from mechanical inspection to electronic verification, so nothing is overlooked. Youโ€™ll see the failed part, understand why it broke, and know exactly whatโ€™s being done to keep it from happening again.

  • 1

    Complete Inspection

    We start by manually operating the door in neutral to check balance and spring tension โ€” a heavy door overloads even a new opener. Then we inspect the drive gear, sprocket, chain/belt, trolley, and mounting brackets for wear. Sensor wiring is traced from end to end, looking for staple damage or rodent chewing. We also check the openerโ€™s power source: a loose outlet or a tripped GFCI can mimic a dead control board, and we test for proper voltage before going further.

  • 2

    Electronic Diagnostics

    We read the logic boardโ€™s diagnostic LED sequence โ€” modern openers flash specific error codes for motor overcurrent, sensor faults, or RPM misreads. A multimeter checks capacitor microfarad rating (a weak capacitor causes a humming motor that wonโ€™t start), and we measure controlโ€‘circuit voltage at the wall console and sensor terminals. If the opener uses a radio receiver, we test signal strength at multiple distances and look for RF interference from nearby LED bulbs or wireless devices that can jam the frequency.

  • 3

    Problem Identification

    We show you exactly what failed โ€” a stripped gear, a swollen capacitor, a corroded terminal โ€” and explain the root cause, not just the symptom. For instance, a burnedโ€‘out motor may really be a result of an unbalanced door the opener fought for months. If repair is possible, we quote it on the spot with OEM part numbers. If replacement makes more sense, we give honest guidance based on opener age, available parts, and whether upgrading to a beltโ€‘drive or smart opener would serve you better longโ€‘term. Thereโ€™s never an upsell โ€” just facts.

  • 4

    Professional Repair

    All repairs use manufacturerโ€‘specified components โ€” we stock common drive gears, sprockets, capacitors, sensors, and logic boards for LiftMaster, Chamberlain, Genie, and Craftsman. When replacing a drive gear, we apply white lithium grease only to the gear teeth and worm drive, then torque the mounting bolts to spec to prevent future misalignment. After any board or sensor replacement, we reset travel limits and force settings so the opener โ€œlearnsโ€ the doorโ€™s correct openโ€‘close positions and wonโ€™t exert excess pressure.

  • 5

    Safety Testing

    We test both safety systems required by federal law: the photoโ€‘eye beam โ€” the door must reverse immediately when the beam is broken during closing โ€” and the contact autoโ€‘reverse, which must reverse within 2 seconds of touching a 2ร—4 laid flat on the ground. Using a force gauge, we verify the door exerts no more than 15 pounds of closing force. The emergency release cord is also pulled to confirm manual operation. If any test fails, we adjust balance or force limits until everything passes, and weโ€™ll document the results for you.

  • 6

    Final Performance Check

    We run the opener through five complete cycles, listening for abnormal grinding, rattling, or excessive motor strain. Remote and keypad range is tested from the driveway and inside the house โ€” if range has degraded, weโ€™ll check antenna placement or offer a rangeโ€‘extender solution. All programmed remotes are verified, and the Homelink system in your vehicle is tested if applicable. Finally, we walk you through basic maintenance: how to lubricate rollers and hinges, what to listen for, and when to call before a small noise becomes a big repair.

Garage Door Opener Repair Throughout The Chattanooga Metro Area

Our technicians live and work in the same Tennessee Valley communities you do. That matters because garage door openers in this region face a unique combination of challenges: high summer humidity that fogs photoโ€‘eye lenses and corrodes terminals, temperature swings that stress capacitors, and the occasional violent thunderstorm that sends voltage spikes through unprotected circuits. We stock trucks with components rated for these conditions and we know the neighborhoodsโ€”from the steep driveways of Signal Mountain to the historic homes in Fort Oglethorpeโ€”so we arrive quickly and get the repair right the first time.

Whether your opener needs a new logic board in East Ridge, safety sensor realignment in Ringgold, or a complete motor swap in Ooltewah, we treat every job with the same thorough diagnosis weโ€™d perform in our own garage. Explore our full Service Areas coverage for additional details, or click any community below to learn more about garage door services in that area. One quick tip: after a heavy rain, check that the bottom of your sensor brackets are dryโ€”standing water around the wire splice can cause an intermittent โ€œfalse obstructionโ€ that makes the door refuse to close. A dry rag and a minute of inspection can save a service call.

How We Repair Openersโ€”and Why It Lasts

Most opener repair services swap the most obvious part and hope the problem goes away. We don't. Our process begins by listening to the sound of the motor, reading the logic board's diagnostic LEDs, and measuring capacitor health under load. Here's what makes our approach different.

  • Technicians Who Show You the Failed Part

    When we diagnose a stripped drive gear or a dead capacitor, we show you the damaged component and explain how it failedโ€”overloaded springs, a power surge, or just years of use. You'll understand the repair before we begin.

  • Diagnostics That Go Beyond the Blinking Light

    Modern openers flash error codes through the learn button. We decode those patterns, but we also measure motor current and capacitor microfarads under load. A humming motor isn't always dead; sometimes a $15 capacitor is all it needs. We never recommend a replacement without testing first.

  • Same-Day Appointments, Local Stock

    We know an opener stuck in the open position is an emergency. Our trucks carry common drive gears, sensors, capacitors, and logic boards for LiftMaster, Chamberlain, and Genie. If the part is on hand, we fix it in one visitโ€”often within a few hours of your call.

  • Honest Advice, No Upsells

    A 2010 chain-drive opener with a worn sprocket can be fixed, but if the motor is near the end of its life, we'll lay out both options: repair now with a shortโ€‘term outlook or replace with a DC beltโ€‘drive that's quieter and more energyโ€‘efficient. The choice is yours, with clear cost and lifespan projections.

  • OEM Parts, Not Generic Copies

    Not all replacement gears are equal. We source parts directly from LiftMaster, Chamberlain, and Genie catalogs to match your opener's exact model and production date. A gear with the wrong tooth pitch or a sensor with mismatched frequency can cause recurring failuresโ€”we guarantee compatibility.

  • Guarantee That Means Something

    If the repair we performed fails within the warranty period, we return at no charge. We also document every force and autoโ€‘reverse test result, so you have a record that your door meets UL 325 safety standards. That's accountability, not just a promise.

How We Approach Garage Door Opener Repairโ€”And Why It Matters

A garage door opener that hums but doesn't move, reverses for no reason, or ignores every remote and keypad usually isn't trying to frustrate youโ€”it's telling you exactly where the fault is. Our job is to decode those symptoms without guessing, so you're not paying for parts that don't need replacing. From a stripped nylon drive gear on a 15-year-old LiftMaster to a dead capacitor that only fails when the mercury drops below freezing, we've seenโ€”and fixedโ€”it all. Here's how we break down the most common opener problems, why they happen, and what a thorough repair actually looks like.

When the Opener Runs But the Door Doesn't Move

You press the button, hear the motor spin, but the door stays put. Most people assume the motor is burned out. In reality, the culprit is almost always the drive gearโ€”a white nylon gear inside the opener housing that's engineered to strip when the door is too heavy. It's a sacrificial part, much like a fuse. If your door feels heavy when you pull the manual release cord, the springs have lost tension, and the opener has been fighting that weight every cycle until the gear finally gave up. We replace the gear and sprocket assembly with the exact OEM tooth count, but we also check spring balance and door weightโ€”because a new gear won't last six months if the underlying overload isn't fixed.
Learn about our Installation Services โ†’

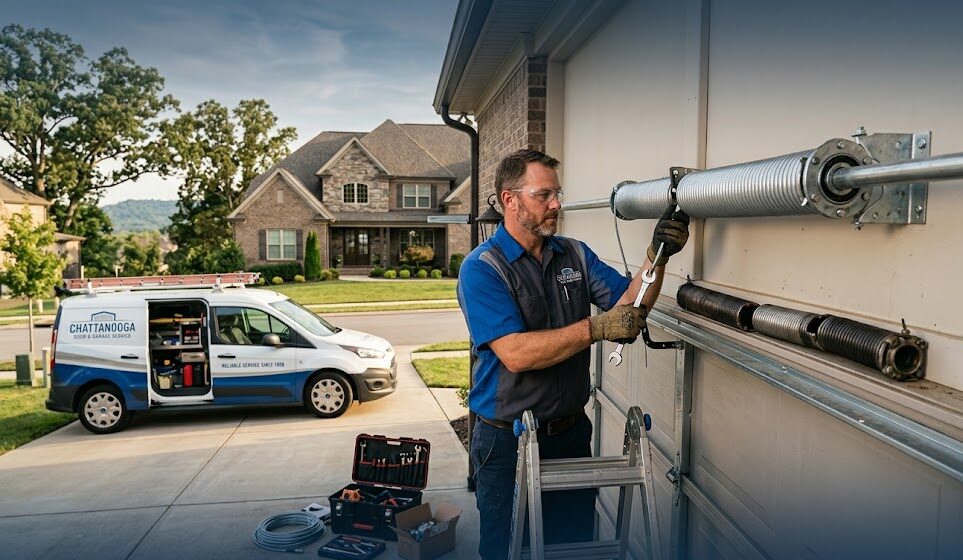
Close-up of a stripped nylon drive gear removed from a garage door opener motor assembly

Remote and Keypad Issues Aren't Always Dead Batteries

When a remote that worked yesterday suddenly stops, the easiest check is the batteryโ€”but that's rarely the real problem. Most modern openers use rolling code technology: each button press sends an encrypted code from a sequence of billions. If the remote is pressed too many times while out of range (like a button getting squished in a purse), the counter inside the remote gets ahead of the opener's receiver, and they fall out of sync. We re-sync them by pressing the learn button and the remote in the correct sequence, but first we verify the receiver's antenna wire isn't damaged and that no nearby LED bulbs are jamming the signal. For wall consoles, a stuck "lock" button is often the silent culpritโ€”it disables all remotes, and many homeowners never realize it was pressed.

View our Service Areas โ†’

Diagnosing garage door remote signal with RF scanner and testing antenna reception on opener unit

Sensor Alignment and the False Obstruction Problem

Two photo-eyes sit near the floor on each side of the doorโ€”one sends an infrared beam, the other receives it. If anything breaks that beam, even briefly, the door reverses. A blinking LED on one sensor tells us which side has lost the lock: a steady amber means the sender is working, but if the green receiver light flickers, the beam is partially broken. Common causes include sensor brackets bumped by a lawn mower, morning sun shining directly into the receiver (especially on west-facing garages), or moisture condensing on the lens during Chattanooga's humid summers. We use a laser to align both sensors to within โ…› inch, clean lenses with an anti-fog cloth, and sometimes install a small shade if solar washout is the issue. If the wiring running to the sensors has been stapled too tightly or chewed by a rodent, we'll find the break with a tone generator and repair the damaged section without replacing the entire harness.
View our Service Guarantee โ†’

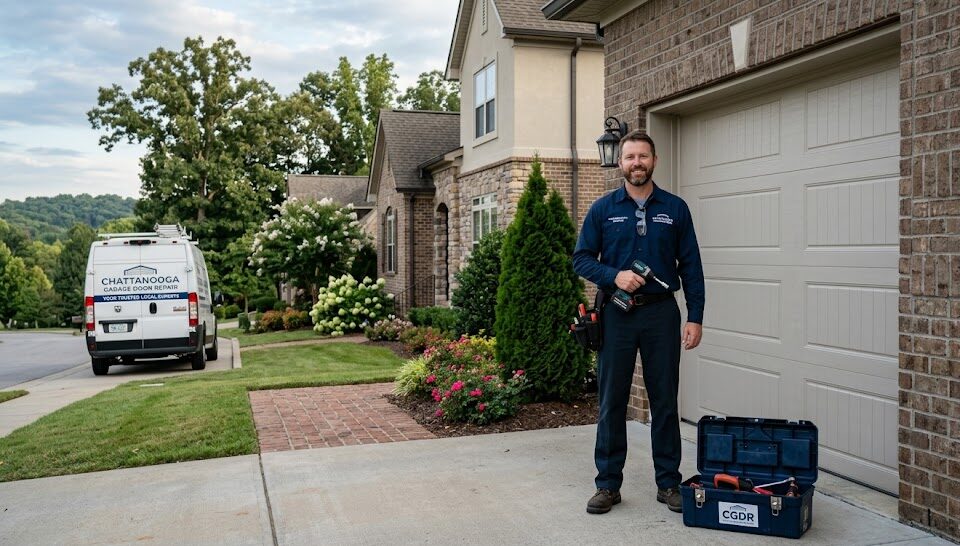
Laser-aligning photo-eye safety sensors on a garage door track for proper beam reception

Smart Openers and Connectivity Glitches

A Wi-Fi-enabled opener that drops offline usually isn't brokenโ€”it's just been kicked off the network after a router firmware update or a power blink. But if the app shows an error like "motor overcurrent" or "RPM sensor fault," the logic board is reading a real mechanical problem. We connect to the opener's diagnostic port, pull the fault log, and read stored error codes before clearing them. Then we re-run the auto-force calibration so the opener learns the door's correct travel limits and doesn't reverse unnecessarily. For batteryโ€‘backup units, a dead internal battery can prevent the board from powering up even when AC power is presentโ€”we test the battery's voltage and replace it if it's below the minimum threshold. If you're upgrading from an older opener to a smart one, we'll also confirm your Wi-Fi signal reaches the garage with enough strength to stay connected reliably.

Explore Replacement Options โ†’

Smart garage door opener with smartphone app connected for remote monitoring and diagnostic codes

When a Motor Replacement Is Actually the Better Path

We don't replace an opener just because it's oldโ€”we look at the whole picture. If a 2008 chain-drive opener needs a new logic board, a capacitor, and a sprocket bushing, that's three separate repairs that may cost more than a new belt-drive unit with battery backup and smart features. But if it's just a stripped gear on an otherwise healthy unit with balanced springs, a $60 part and an hour of labor will get it running again. We show you the failed component, explain the costs of repair versus replacement, and let you decide. Because we stock OEM gears, capacitors, and sensors for LiftMaster, Chamberlain, and Genie, we can often complete the repair in one visitโ€”whether you're on the side of Signal Mountain or off East Brainerd Road.
Learn more About Us โ†’

Comparison of a worn chain-drive opener next to a new belt-drive unit for homeowner evaluation

Safety Testing After Every Repairโ€”Every Single Time

Federal law mandates that a garage door reverse within two seconds of breaking the photo-eye beam, and the autoโ€‘reverse must stop and reverse when it contacts a 2ร—4 laid flat on the ground. After any opener repair, we perform both tests with a force gauge. If the door exerts more than 15 pounds of closing force before reversing, the springs are likely unbalanced, and the opener's force settings have been cranked up to compensateโ€”a dangerous situation. We'll adjust the balance, reโ€‘teach the travel limits, and test again until everything passes. We also pull the emergency release to make sure you can operate the door manually in an outage. This isn't a quick checkmarkโ€”it's a documented step we take seriously because garage door safety systems protect people, not just property.

View our Service Guarantee โ†’

Technician performing contact auto-reverse test with a 2x4 on the ground under a closing garage door

Emergency Service When You're Stuck Outside (or Inside)

An opener that dies with the door in the closed position can feel like a genuine emergencyโ€”especially if your only entrance is through the garage. In those cases, pulling the emergency release cord is the immediate fix: it disengages the trolley so you can lift the door manually. But if the door is heavy and won't stay open, the springs are the real problem, not the opener. We dispatch a technician who will not only get the opener functioning but also assess whether broken springs caused the failure in the first place. We carry a wide range of replacement parts on the truck, so in many cases, we can complete the repair on the spotโ€”restoring secure, automatic operation before the end of the day. Whether you're in Rossville, Red Bank, Soddy-Daisy, or up on Lookout Mountain, we'll be there quickly, because we live and work in the same neighborhoods.

Contact Us for Emergency Service โ†’

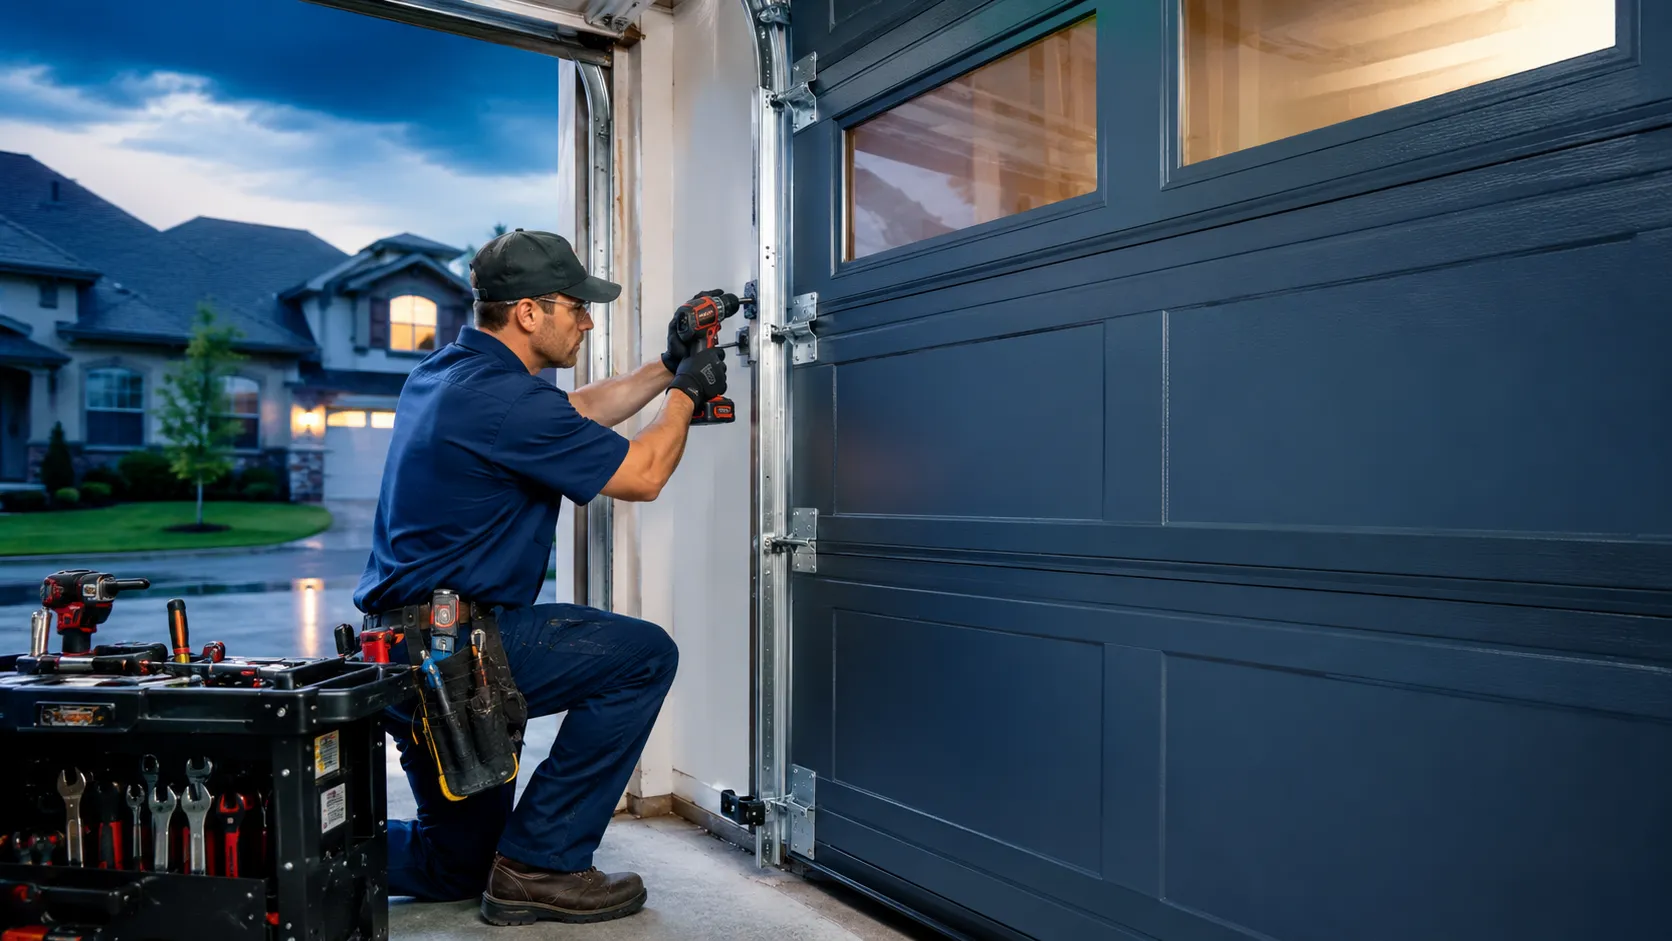
Garage door opener repair van parked in a residential driveway with technician preparing tools

Maintenance Habits That Keep Your Opener Alive Longer

An opener that's properly maintained can last 15 years or more. The single most damaging thing is running the opener against an unbalanced doorโ€”it's like driving with the parking brake on. Every six months, pull the red release handle and lift the door halfway; if it doesn't stay put, the springs need adjustment. Second, lubricate the rollers and hinges with a silicone-based spray, but never grease the opener rail itselfโ€”that attracts dirt and causes the trolley to bind. Third, wipe the photo-eye lenses with a dry microfiber cloth. And if your opener's LED light blinks 10 times when it won't close, that's not a mysteryโ€”it's a diagnostic code that means the safety sensors are blocked or misaligned. Knowing these small signals can save you a service call, and we'll always explain them during any visit.

Visit Spring Repair Services โ†’

Applying silicone lubricant to garage door rollers and inspecting hinge wear for opener longevity

Serving the Chattanooga Valley With Local Expertise

Garage doors here face a unique mix: high summer humidity that corrodes terminals and fogs sensor lenses, rapid temperature swings that stress capacitors, and the occasional violent thunderstorm that sends spikes through unprotected circuits. Our technicians live across the Tennessee Valleyโ€”from Chattanooga and Ooltewah to Signal Mountain, Ringgold, Fort Oglethorpe, and beyond. We understand the local housing stock: the steep driveways of Lookout Mountain that demand smooth belt-drive units, the historic homes in St. Elmo with tight clearances, and the newer construction in East Brainerd that often benefits from smart openers with battery backup. If your opener is acting up, we'll treat your home like our ownโ€”with a methodical diagnosis, an honest recommendation, and a repair that's tested to last.

View All Service Areas โ†’

Garage door opener repair service map covering Chattanooga, Ooltewah, Signal Mountain, and surrounding GA communities

Frequently Asked Questions

We hear these questions every day from homeowners across the Tennessee Valley. The answers below come from real diagnostic experienceโ€”not a script. If you still have questions after reading, give us a call and we'll help you figure out what's going on, no charge for the conversation.

  • Why is my garage door opener not responding at all?

    No response from the wall switch, remote, or keypad usually points to a power failure. First, check if the opener is plugged into a working outletโ€”many garages have a GFCI outlet that can trip without you realizing it. Press the "test" and "reset" buttons on the outlet. If the outlet has power but the opener is silent, the logic board's internal fuse may have blown or the transformer has failed. Look for a small glass fuse near where the power cord enters the unit. Modern openers also have a "lock" feature on the wall console that disables all remotes; if the console's LED is blinking rapidly, the lock mode is onโ€”press and hold the lock button for a few seconds. If none of these steps work, a technician can check voltage at the board and confirm whether the problem is a simple power supply issue or a deeper component failure.

  • Can you repair garage door opener motors?

    Yes, but "motor failure" is often misdiagnosed. When you hear a humming sound but the door doesn't move, the motor is actually runningโ€”the problem is usually a stripped drive gear (a white nylon part inside the housing), a broken sprocket, or a failed capacitor that can't deliver enough starting torque. We test the capacitor's microfarad rating under load and measure motor amp draw before concluding the motor itself is bad. If the windings are burnt or the bearings are seized, we can replace the motor assembly on many units, particularly LiftMaster and Chamberlain models where parts are readily available. For openers older than 12โ€“15 years, it's often more cost-effective to replace the entire powerhead with a modern DC belt-drive unit that runs quieter and uses less electricity. We'll show you the test results and let you decide.

  • Why do my safety sensors keep blinking?

    Each photo-eye has an LED that tells you what's wrong. The sender (usually amber) should stay solid. The receiver (green) should also stay solid when the beam is aligned. A blinking green light means the beam is partially broken or the receiver is seeing glare. Common causes: morning or afternoon sun hitting the receiver directly (install a small cardboard shade as a test), condensation on the lens from Chattanooga humidity (wipe with a dry microfiber cloth), or the sensor bracket got bumped by a lawn mower or trash can. A blinking amber sender usually means a wiring issueโ€”either a loose connection at the terminal, a staple cutting into the wire, or a break in the low-voltage line. We trace the wire with a tone generator to find the exact break without unnecessary wire replacement. If both LEDs are off, check for 5โ€“6 volts DC at the opener's sensor terminals; a missing voltage points to a logic board problem, not the sensors themselves.

  • Can you program new garage door remotes?

    Absolutely. We program all brands of remotes, wireless keypads, and vehicle Homelink systems. The process depends on your opener's learn button color: yellow (Security+ 2.0), purple (Security+ 315MHz), red/orange (Security+ 390MHz), and green (older billion-code). Each protocol uses different frequencies and encryption, so a remote must match the button color. We also clear out old remotes from the opener's memory if you've recently purchased the homeโ€”most openers can store 8โ€“12 remotes, and a full memory will prevent new ones from programming. For Homelink, the in-car system needs to be put into training mode while someone presses the learn button on the opener within 30 seconds; some European vehicles require a compatibility bridge. We handle the entire process and test every remote before leaving.

  • Should I repair or replace my garage door opener?

    Consider three factors: age, repair cost, and what you gain by upgrading. If your opener was installed before 2010, it likely has an AC motor that's louder, less energy-efficient, and lacks modern safety features like battery backup or auto-force adjustment. A repair that costs more than 50% of a new unit's price usually makes replacement the smarter long-term choice. For example, a new DC belt-drive opener with Wi-Fi capability and backup battery typically runs quieter and can be controlled from your phoneโ€”a significant upgrade if your current unit is a chain-drive model over 15 years old. If the opener is under 8 years old and the problem is a single component like a capacitor or gear, repair is the clear winner. We quote both options honestly and never push a replacement that isn't necessary.

  • Do you repair smart garage door openers?

    Yes, and the most common "smart" issue we see is Wi-Fi disconnection, not mechanical failure. Many smart openers use 2.4GHz Wi-Fi (not 5GHz), and they can drop off the network after a router firmware update or if the garage is far from the access point. We reconnect the opener, check signal strength, and recommend a mesh extender if needed. If the app shows error codes like "motor overcurrent" or "RPM sensor fault," the logic board is detecting a real mechanical issueโ€”a binding door, a failing capacitor, or an encoder disc misalignment. We pull the diagnostic log, clear stored faults, and run the auto-force calibration so the opener re-learns the door's travel limits. These units also have a backup battery that can fail; if the opener won't power up even with AC present, a dead battery can prevent the board from initializingโ€”we test it and replace if necessary.

  • Do you offer emergency garage door opener repair?

    Yes, we prioritize same-day service for emergencies where the door won't close and your home is unsecured. In the meantime, you can pull the red emergency release cordโ€”it disengages the trolley from the drive mechanism so you can lower the door by hand. If the door is extremely heavy or slams shut when you try to lower it manually, the springs are broken and should never be operated by yourself. Do not attempt to fix springs; call us immediately. Our trucks carry common parts for LiftMaster, Chamberlain, and Genie, so we often complete the repair on the first visit. Even if we can't fix it that day, we'll secure the door and return with the needed part as soon as possible.

  • Do you serve all Chattanooga area communities?

    We serve homeowners across Hamilton, Catoosa, Walker, and Dade counties, including Chattanooga, Ooltewah, East Ridge, Signal Mountain, Red Bank, Soddy-Daisy, Ringgold, Fort Oglethorpe, Rossville, Collegedale, Lookout Mountain, and Harrison. Our technicians live throughout the valley, so someone is usually nearby. Visit our Service Areas page to see the full list, or check our FAQ page for additional answers to common repair questions.

Schedule Your Garage Door Opener Diagnostic Today

A technician will arrive, measure capacitor health, motor current draw, and gear wearโ€”then show you the failed component and explain the repair in plain language. You get a flat price before we touch a tool, and every repair includes a force gauge safety test and a walkthrough of what caused the failure so you know it won't happen again. That's the standard at Chattanooga Garage Doors Pro.

Diagnostic Fee Applied to Repair OEM Parts & Labor Warranty Force Gauge Safety Test Included Sameโ€‘Day Service, No Rush Fee